Creating a cohesive surveillance system with cameras from different brands can be challenging, but an ONVIF NVR makes it straightforward. This guide explains how an ONVIF NVR connects with various security cameras to deliver a dependable and efficient security setup, helping you protect what matters most with minimal hassle.

Why Choose an ONVIF NVR?
What Is an ONVIF NVR?
An ONVIF NVR is a network video recorder that adheres to the Open Network Video Interface Forum (ONVIF) standard, enabling interoperability between IP-based security devices. This standard ensures that cameras and recorders from different manufacturers work together seamlessly, reducing compatibility issues.
Key Advantages of ONVIF NVRs
Using an ONVIF NVR allows you to integrate cameras from multiple brands, saving costs and offering flexibility. It supports future upgrades and simplifies maintenance, making it ideal for both small and large surveillance systems.
How to Integrate Security Cameras with an ONVIF NVR
Step 1: Verify ONVIF Compliance
Check that your cameras and NVR support ONVIF standards, specifically Profile S for basic video streaming or Profile G for recording and storage. Review product manuals or manufacturer websites to confirm compatibility.
Step 2: Prepare Your Network
Connect all devices to the same network. Use a PoE switch for cameras that support Power over Ethernet to simplify wiring and ensure stable connections. Verify that your network has sufficient bandwidth for high-quality video feeds.
Step 3: Configure Camera Settings
Log into each camera’s interface to enable ONVIF protocol. Adjust settings like resolution, frame rate, and compression to match your NVR’s capabilities and your security needs.
Step 4: Link Cameras to the NVR
Access the NVR’s management interface and add cameras by entering their IP addresses, usernames, and passwords. Many ONVIF NVRs offer automatic device discovery, which speeds up this process.
Step 5: Test and Fine-Tune
After adding cameras, test live feeds and recording functions. Adjust motion detection, storage schedules, or video quality to optimize performance and ensure your IP surveillance system runs smoothly.
Best Practices for a Reliable ONVIF NVR Setup
- Update Firmware Regularly: Keep your NVR and cameras updated to maintain security camera integration and fix bugs.
- Monitor Bandwidth Usage: Ensure your network supports the data demands of your cameras to avoid delays or dropped connections.
- Use Matching ONVIF Profiles: Stick to the same profile across devices for full feature compatibility.
- Secure Your System: Enable strong passwords and encryption to protect against unauthorized access.
Troubleshooting Common Integration Issues
Camera Detection Failures
If the NVR doesn’t detect a camera, ensure ONVIF is enabled in the camera’s settings and verify IP settings. Check for network firewalls blocking communication.
Inconsistent Video Quality
Lag or pixelation often results from bandwidth limitations or mismatched settings. Reduce resolution or frame rate, or upgrade your network infrastructure.
Limited Feature Support
Some features, like analytics or PTZ, may not work if devices use different ONVIF profiles. Confirm profile compatibility before purchasing.
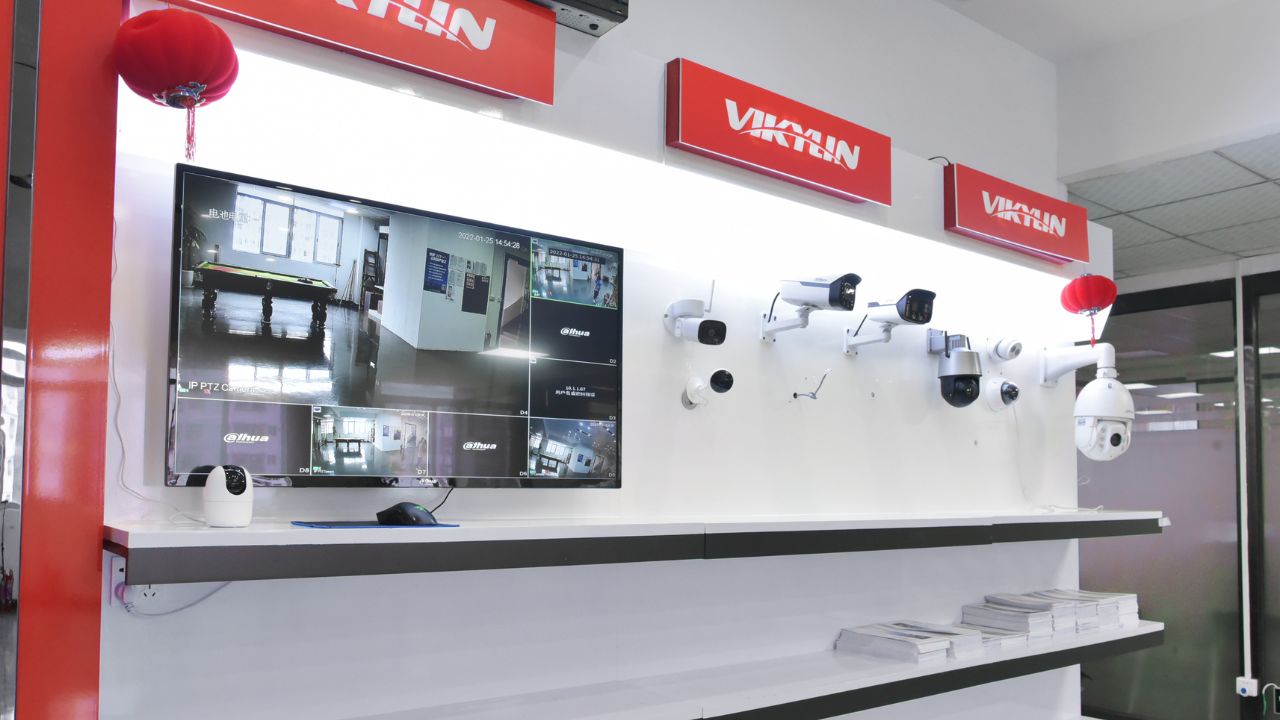
Why Choose VIKYLIN
VIKYLIN offers high-quality, ONVIF-compliant cameras and NVRs designed for seamless security camera integration and reliable performance. Our products are user-friendly, cost-effective, and backed by excellent customer support, ensuring your network video recorder setup meets your specific security needs.
Conclusion
An ONVIF NVR simplifies building a versatile IP surveillance system by ensuring camera compatibility across brands. With this guide, you can set up a system that delivers consistent performance and peace of mind. Contact VIKYLIN today to explore our security solutions and request a customized quote for your security needs.