This document describes in detail how to add IPC (IP Cameras) with PoE function to an NVR that supports PoE. Two methods are available: Manual mode and Plug-and-Play mode.
Before using Plug-and-Play mode, ensure that the IPC camera password is the same as the NVR password. If not, please set the camera password to 12345.
Note: Plug-and-Play mode only works when the IPC is directly connected to the PoE ports of the NVR.
Preparation
Before configuration, please confirm the following equipment is ready:
- PoE IP Cameras
- PoE NVR
- PoE Switch (required for Manual mode)
- Network cables (CAT5E or above)
Method 1: Add PoE Cameras to NVR Using Manual Mode
This method is recommended when IPC cameras are connected through a PoE switch.
Step 1: Hardware Connection
- Connect the IPC camera to the PoE port of the PoE switch using a network cable.
- Connect the NVR to the same PoE switch.
- Power on the camera and NVR, and wait until the camera is fully started.
Step 2: Enter Camera Management Interface
- Log in to the NVR locally using a mouse and monitor.
- Go to: Camera Management → Camera → IP Camera.
- Select an unused channel, then click the Edit button.

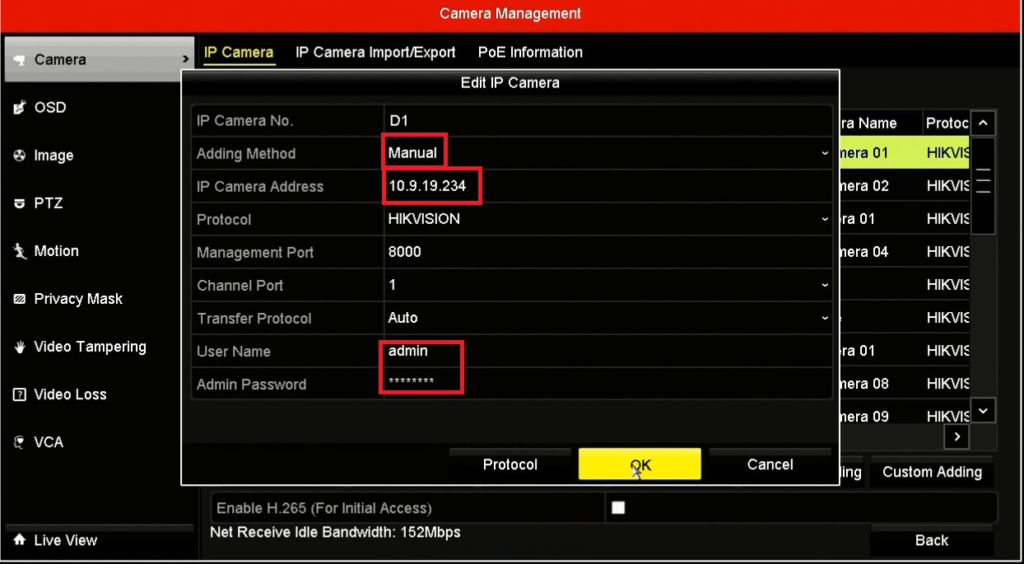
Step 3: Configure Camera Parameters Manually
- Set Adding Method to Manual.
- Enter the IP Camera Address (camera IP).
- Enter the User Name (default is usually admin).
- Enter the Admin Password of the camera.
- Click OK to save the configuration.
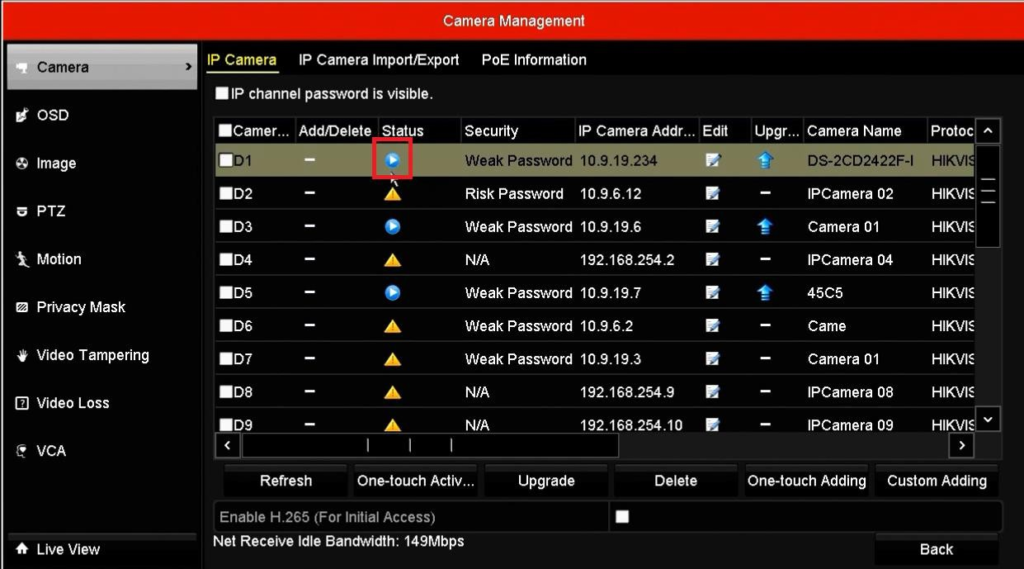
Step 4: Verify Camera Status
- After adding, check the camera status in the IP Camera list.
- Status should show Online with no warning icons.
- Live view should appear normally.
Important Notes for Manual Mode
• In Manual mode, the IPC password can be different from the NVR password.
• Do NOT click One-touch Adding unless the camera password is the same as the NVR password or the camera password is set to 12345.
Method 2: Add IPC with PoE Function Using Plug-and-Play Mode
This method is suitable when IPC cameras are directly connected to the PoE ports of the NVR.
Step 1: Hardware Connection
- Connect the IPC camera directly to one of the PoE ports on the NVR (for example, PoE port 2).
- Power on the NVR and wait for the camera to initialize.
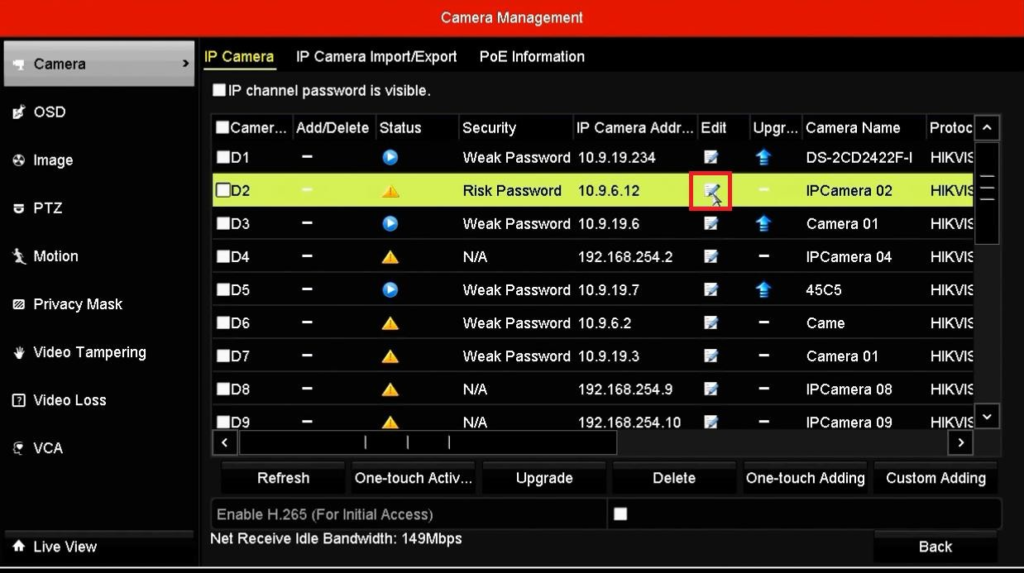
Step 2: Access IP Camera Configuration
- Log in to the NVR interface.
- Navigate to: Camera Management → Camera → IP Camera.
- Select the corresponding channel (e.g., D2) and click Edit.
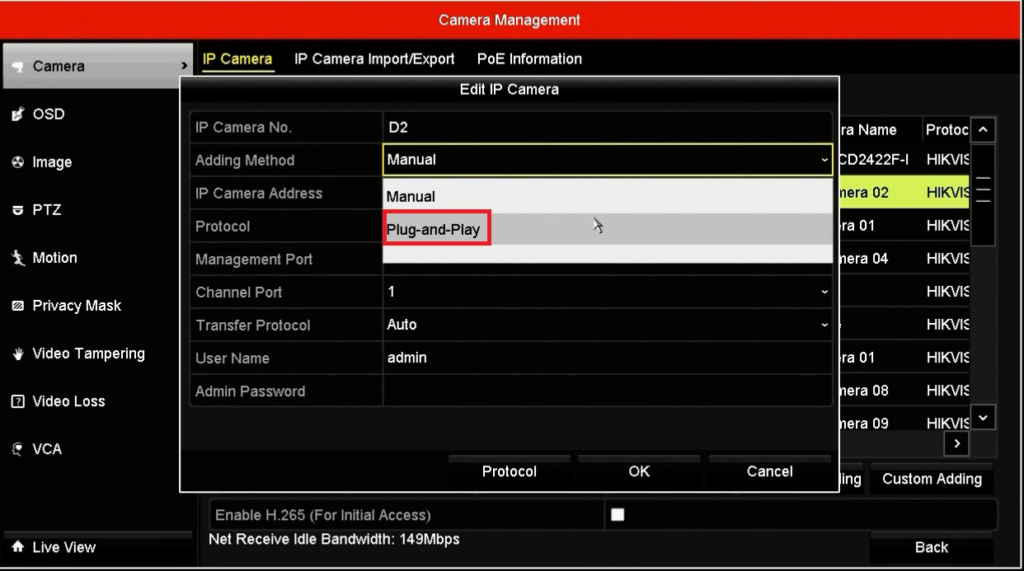
Step 3: Enable Plug-and-Play Mode
- Set Adding Method to Plug-and-Play.
- Confirm that the camera password is the same as the NVR password.
- Click OK to complete the configuration.
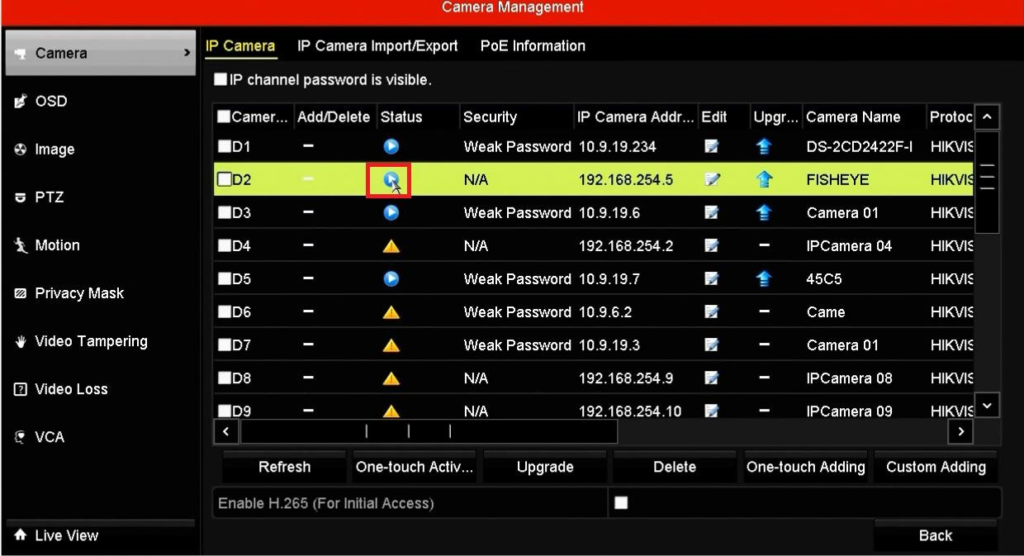
Step 4: Confirm Camera Online Status
- Return to the IP Camera list.
- Ensure the camera status shows Online.
- Check live view for proper video display.
Important Notes for Plug-and-Play Mode
• IPC camera password MUST be the same as the NVR password.
• Do NOT click One-touch Adding manually.
• Plug-and-Play mode only works when Hik cameras are directly connected to NVR PoE ports.