When timestamps are wrong, even the best video surveillance hardware becomes difficult to use for investigations, compliance, or customer support. By following Dahua IP camera time setting in the Web 5.0 interface, you ensure that every recorded frame aligns with real‑world events and your NVR or VMS timeline. This guide walks through the five official Dahua steps one by one so security integrators and end users can configure time quickly and accurately on any compatible IP camera deployed in a PoE security camera system.
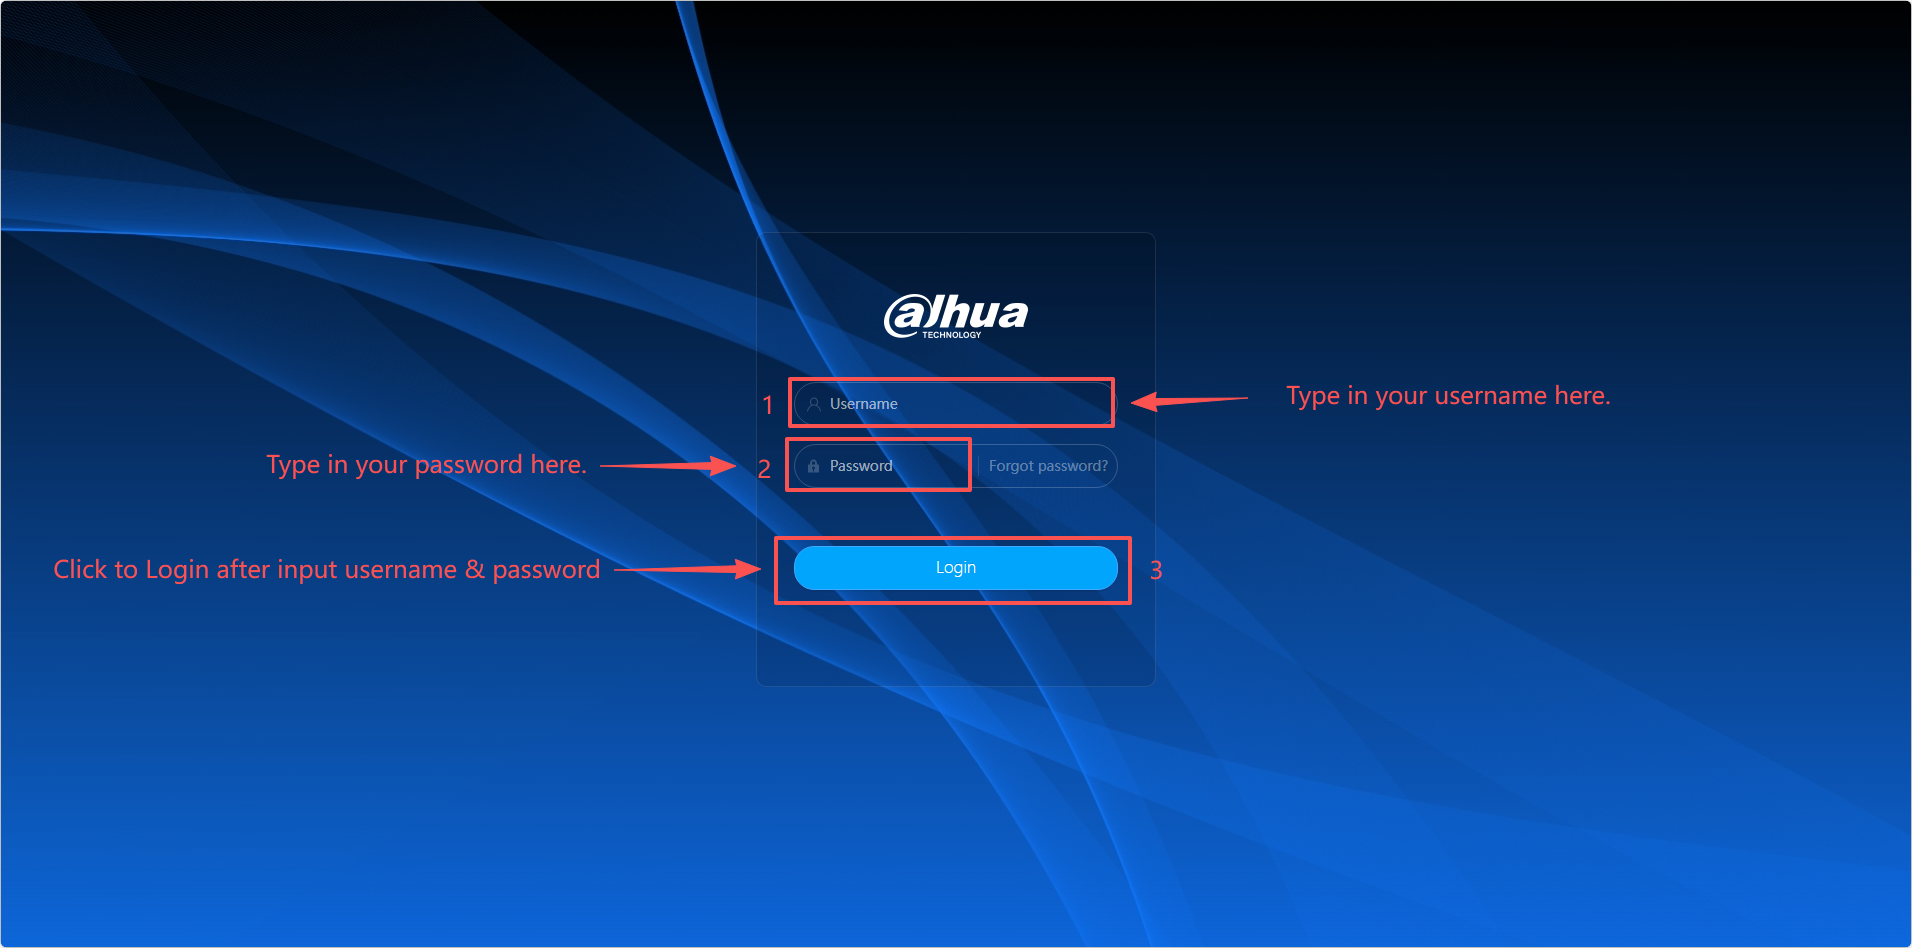
Step 1: Log in to your IP camera
Open a web browser on a PC that can reach the camera over your network, then enter the camera’s IP address in the browser address bar. On the login page, input the correct username and password, and click “Login” to access the Dahua Web 5.0 interface for that IP camera.
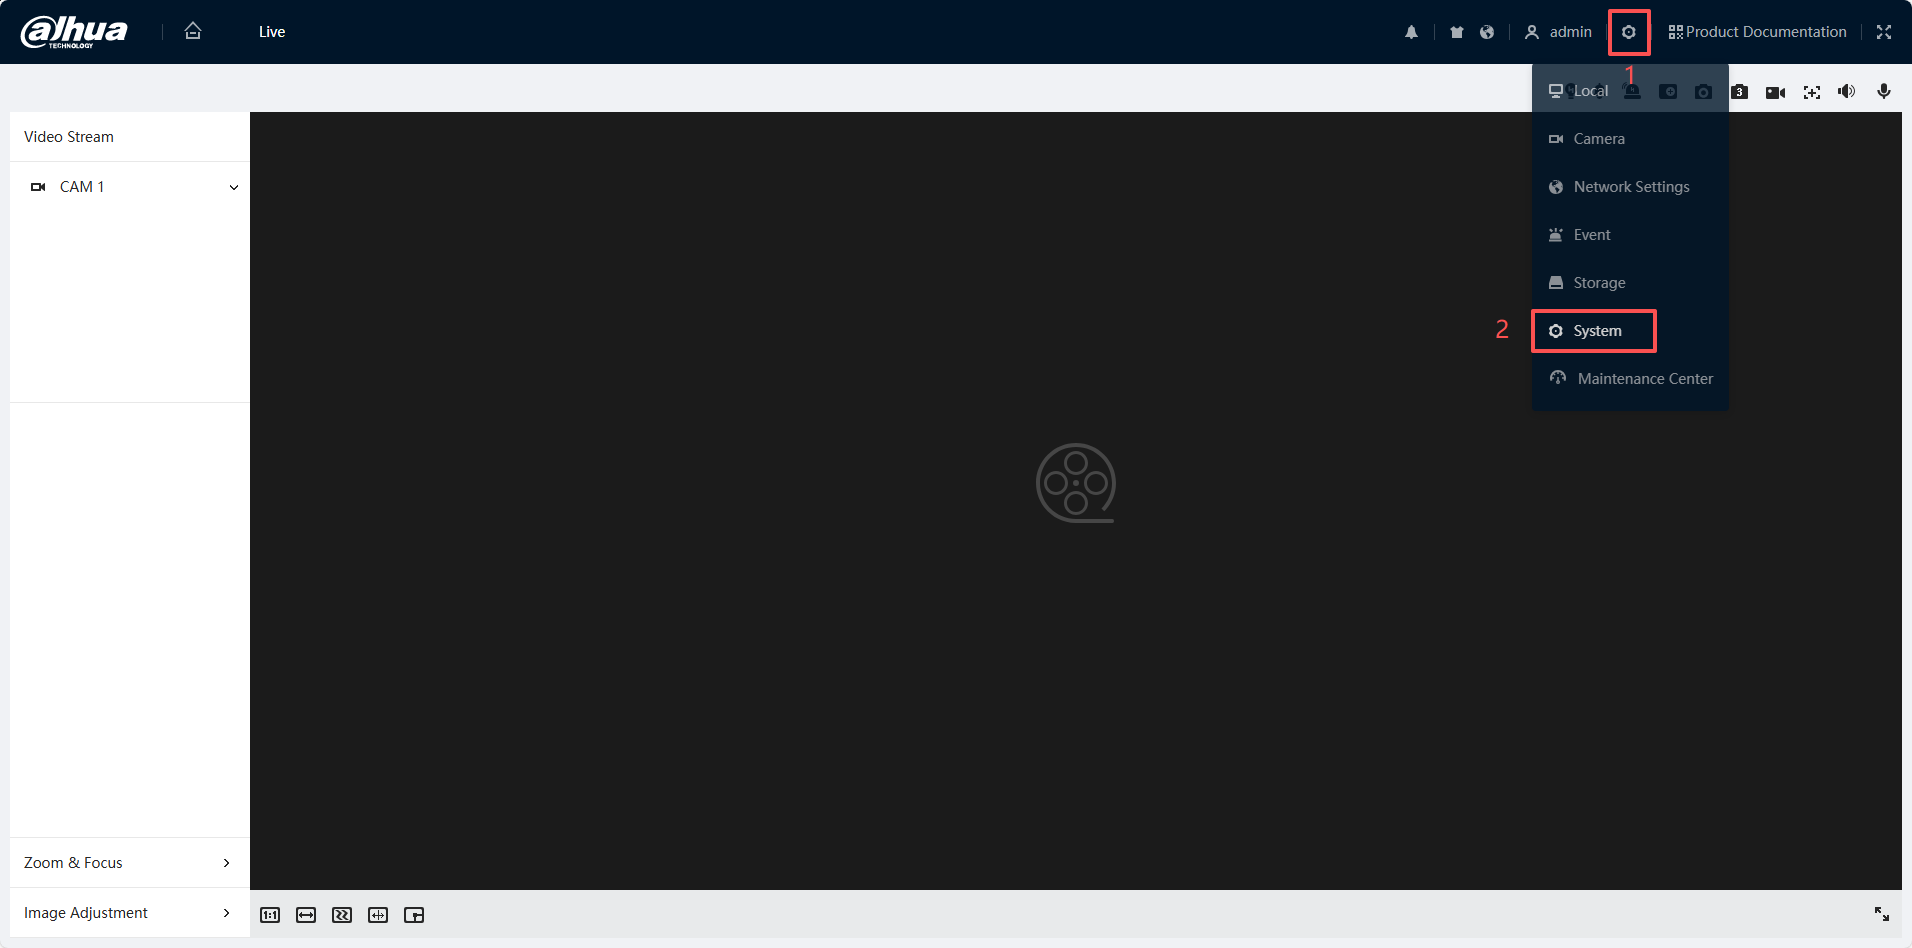
Step 2: Go to Settings → System
After logging in, look toward the upper area of the Web 5.0 interface and click Settings to open the configuration menu. In the Settings menu, select System, which contains core system options including the menu where Dahua IP camera time settings are configured for both indoor and 4K outdoor security camera models.
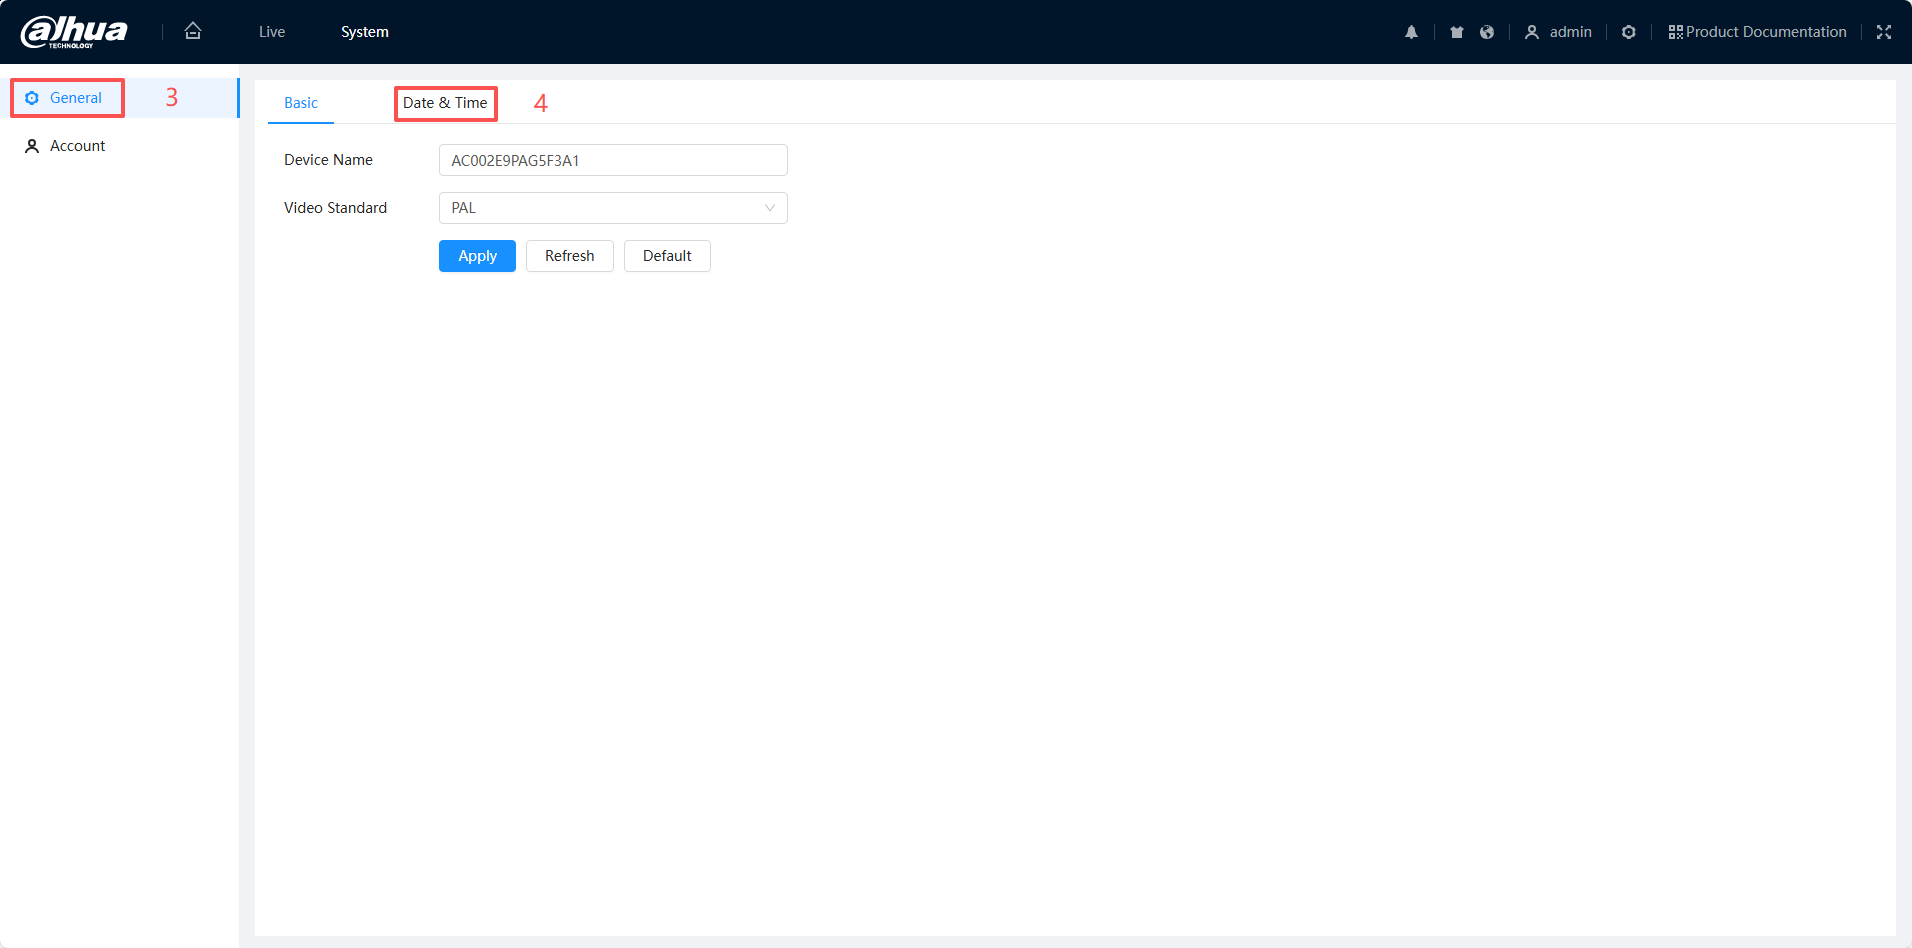
Step 3: Open General → Date & Time
Inside the System section, click on General to display general system parameters. Then select Date & Time to be redirected to the Date & Time tab, where you can adjust all relevant time options for the IP camera, whether it is a standalone device or part of a larger NVR security system kit.
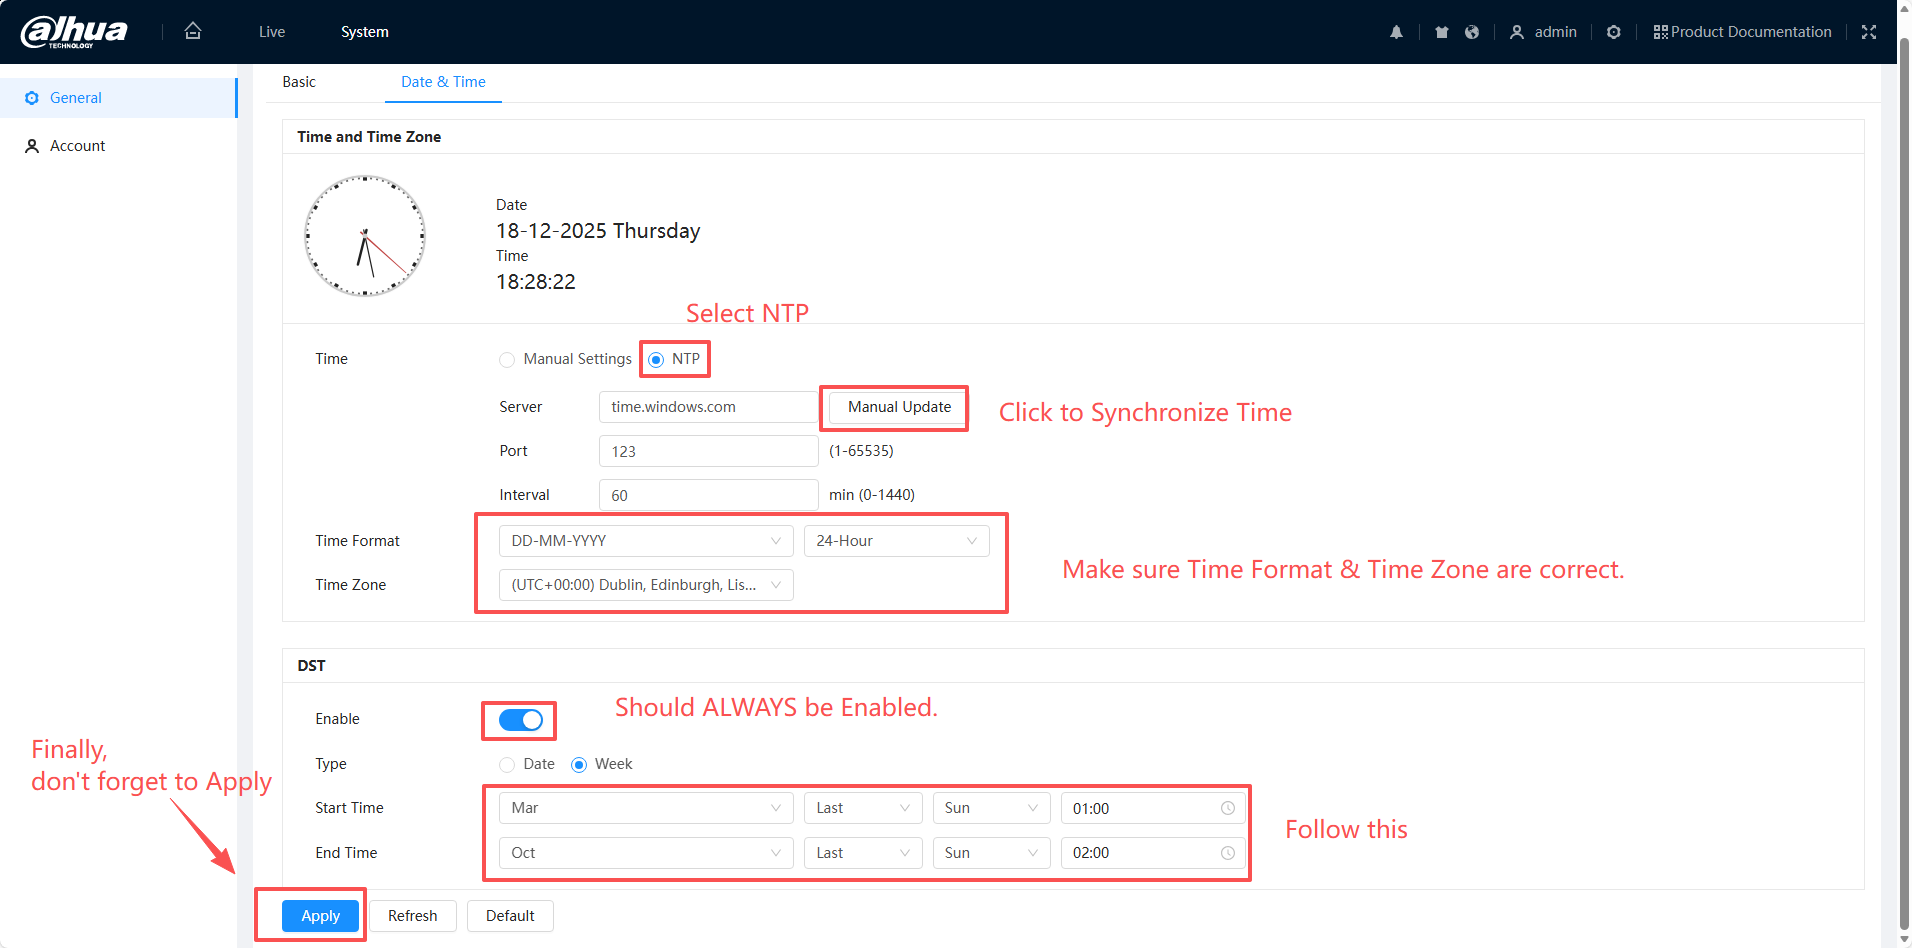
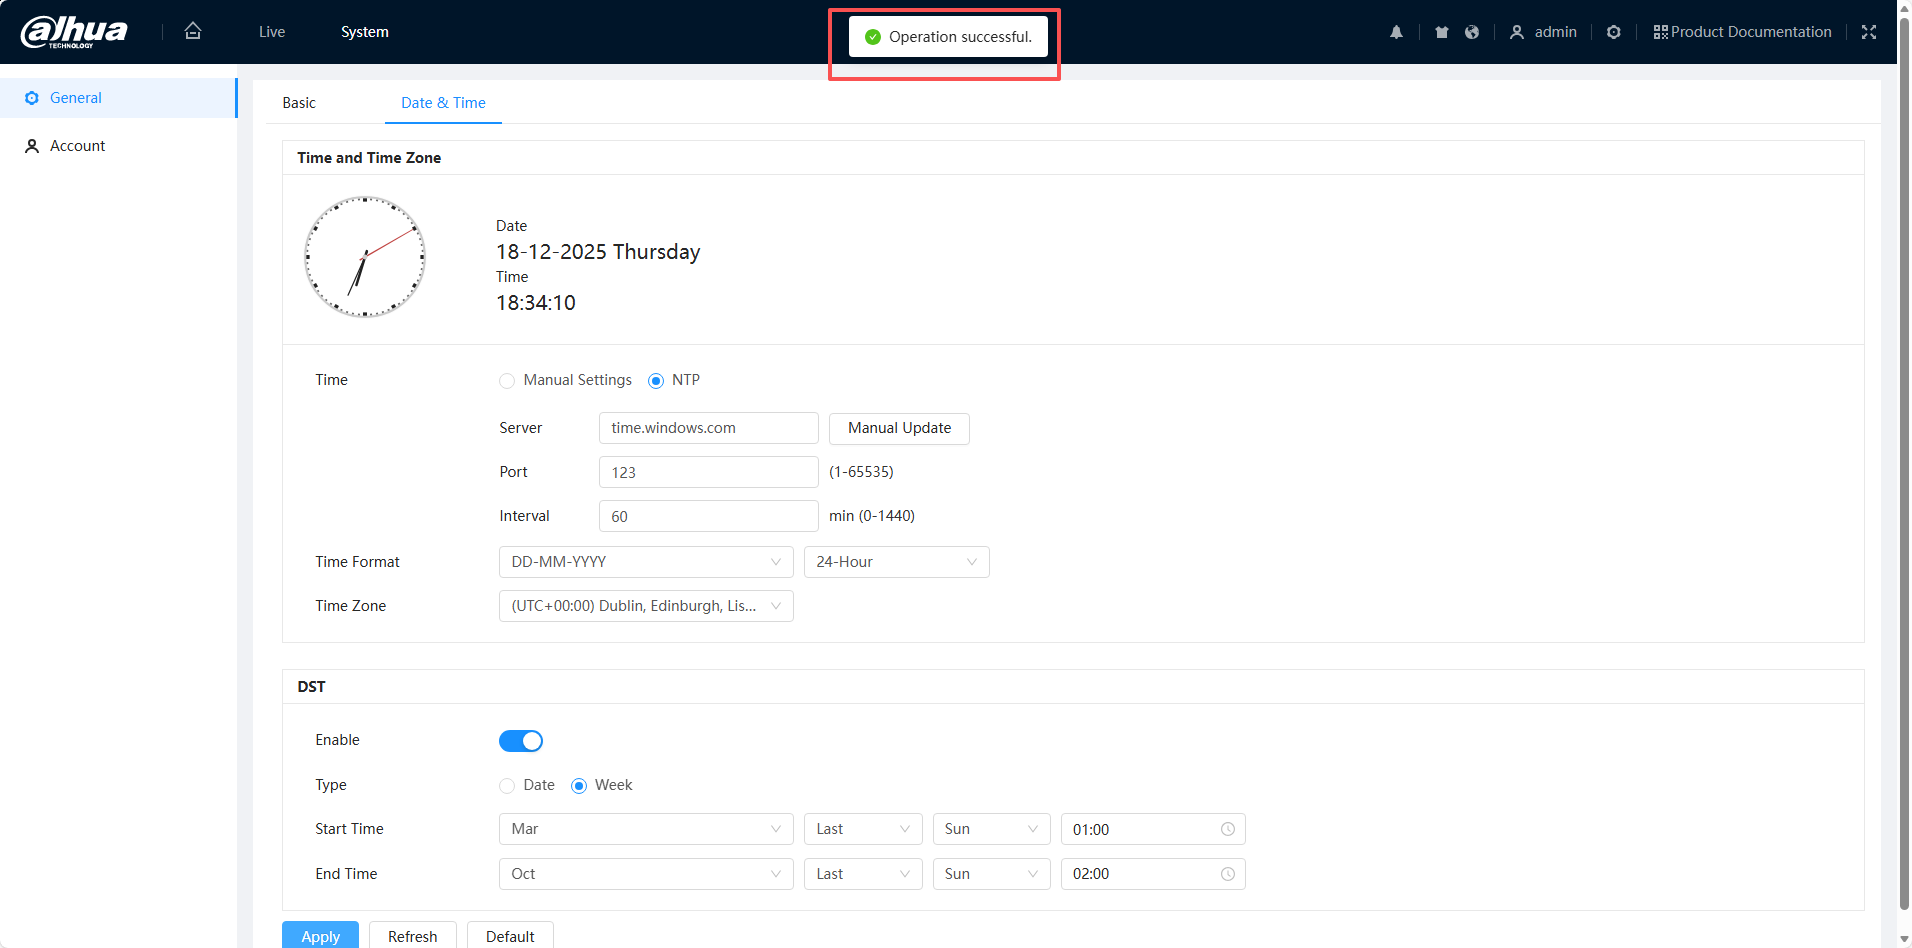
Step 4: Configure NTP and DST (for Internet‑connected cameras)
If your IP camera is connected to the Internet, Dahua recommends using NTP so the camera can synchronize its clock with a reliable remote time server. Under the Date & Time tab, select NTP, confirm the NTP server settings, then click Manual Update to synchronize local time to remote time on the server.
For users in the UK and Ireland, Dahua specifies that you must also configure DST (Daylight Saving Time) in the same interface. The DST standard given is: Start Time in March on the last Sunday at 01:00 AM, and End Time in October on the last Sunday at 02:00 AM. Installers working with an IP camera with microphone for audio recording should match NTP and DST settings to ensure that both video and audio events line up with accurate timestamps.
Step 5: Confirm synchronization and notification
After clicking Manual Update in NTP mode, a confirmation dialog appears asking if you want to synchronize the time with the server. Click Yes to finalize the synchronization so the camera’s internal clock matches the NTP server time.
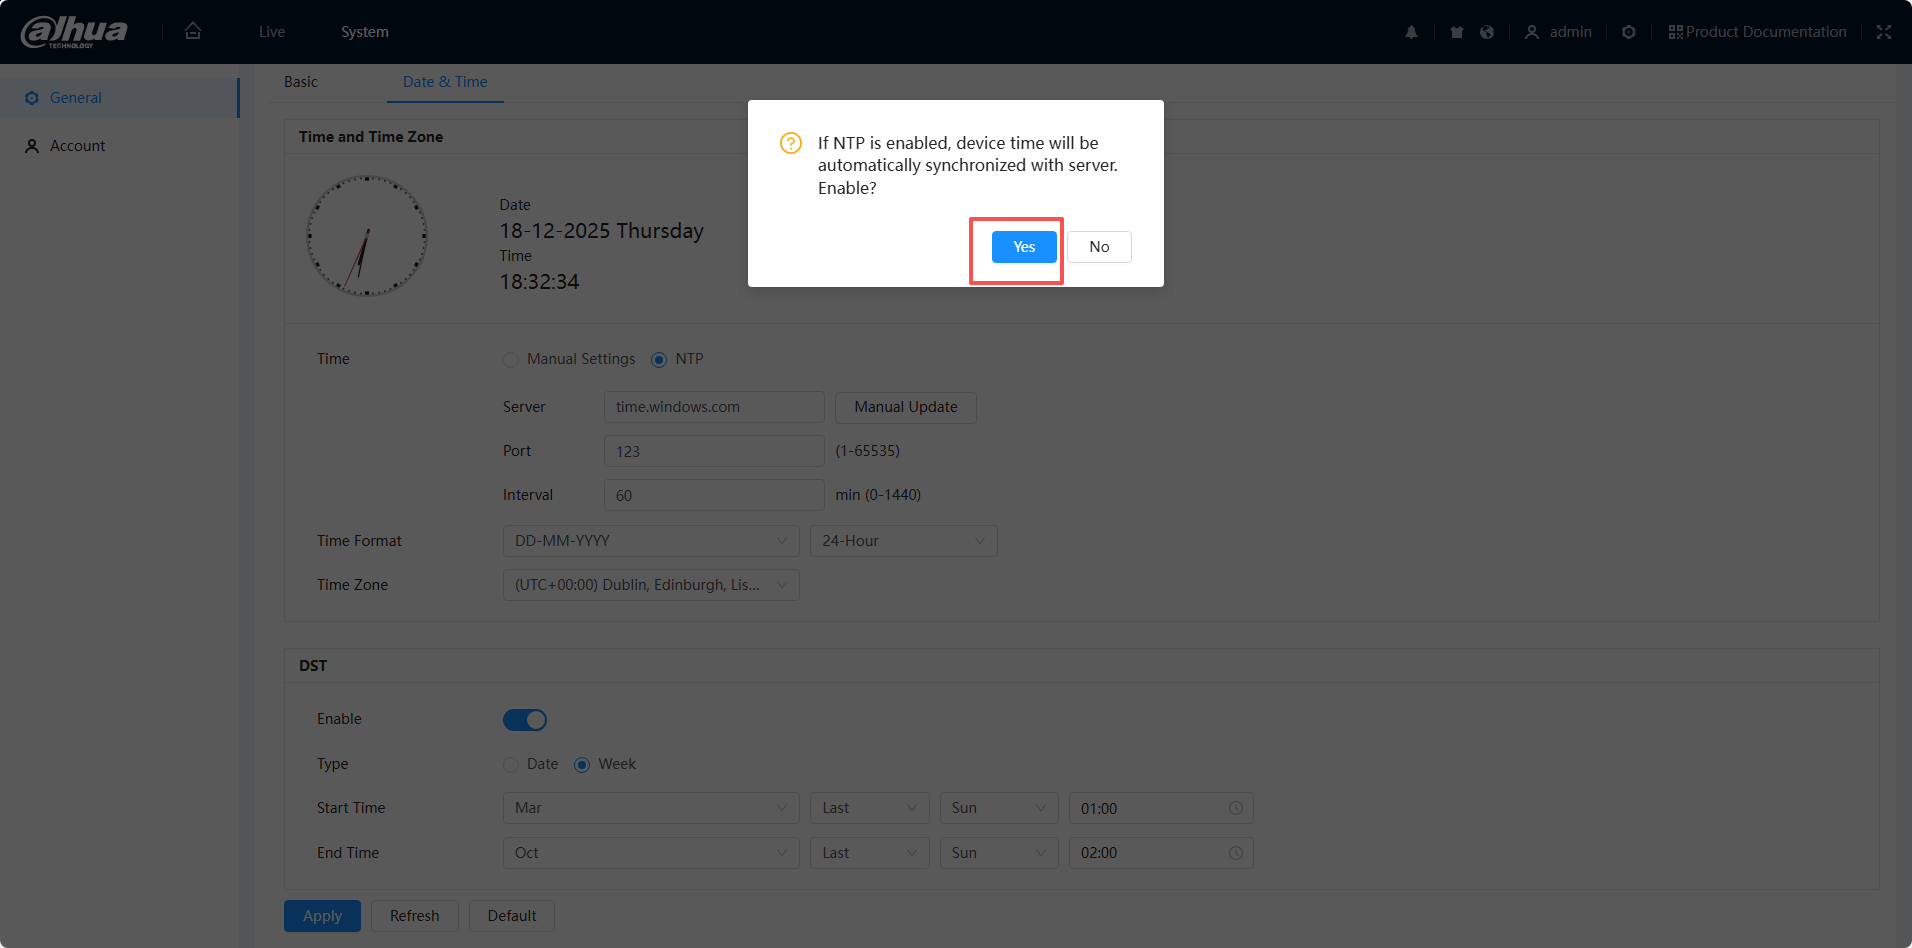
When synchronization is successful, a small pop‑up notification appears on screen for a few seconds before automatically disappearing. You can then verify that the Dahua IP camera time settings are correct by checking the displayed time in the interface or in recorded video clips.
About VIKYLIN as a Dahua distributor
VIKYLIN is a dedicated Dahua distributor, providing genuine Dahua IP cameras, PoE security camera system bundles, and NVR security system kits for professional and SMB surveillance projects. By sourcing directly through authorized channels, we help integrators and buyers obtain the right models, firmware support, and accessories for each deployment, from compact IP camera with microphone options to robust 4K outdoor security camera units.
Conclusion
Correct Dahua IP camera time settings ensure that every alarm, snapshot, and video clip is tied to an accurate timestamp, making investigations and incident reviews faster and more dependable. If you need help selecting Dahua cameras, building a PoE security camera system, or choosing the best NVR security system kit and 4K outdoor security camera combinations for your site, contact VIKYLIN today for detailed product recommendations and pricing.