Whether it’s system surveillance camera or other smart devices, assigning IP address manually can be time-consuming and prone to errors. This is where Dynamic Host Configuration Protocol (DHCP) comes in, streamlining the process of IP assignment. In this guide, we will show how to enable DHCP on Hikvision NVR to get an lP address automatically.
It is very important to mention that do not forget to have your local router ready to work with the DHCP service, otherwise, there’s no way for the hik vision cameras to get an lP. Let’s dive into the details.
What is DHCP?
DHCP, short for Dynamic Host Configuration Protocol, which was created to automatically assign IP to those network devices.
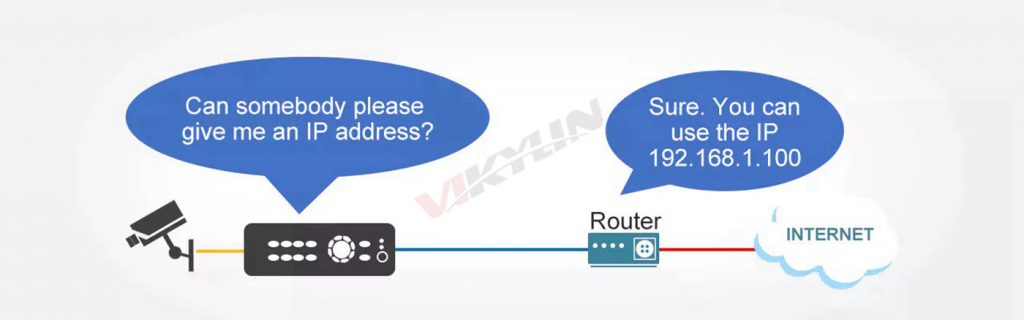
It allows a router or dedicated server to dynamically assign IP address instead of manually configuring each device. So when you enable DHCP on Hikvision network video recorder, it will send a broadcast message to the network asking for the lP that can be used to become part of the network and have access to the Internet. See the image below.
Every router has a different menu to enable DHCP Hikvision, but you can find the configuration in the “LAN Setup”, check it on your router.
How to enable the DHCP on the Hikvision NVR?
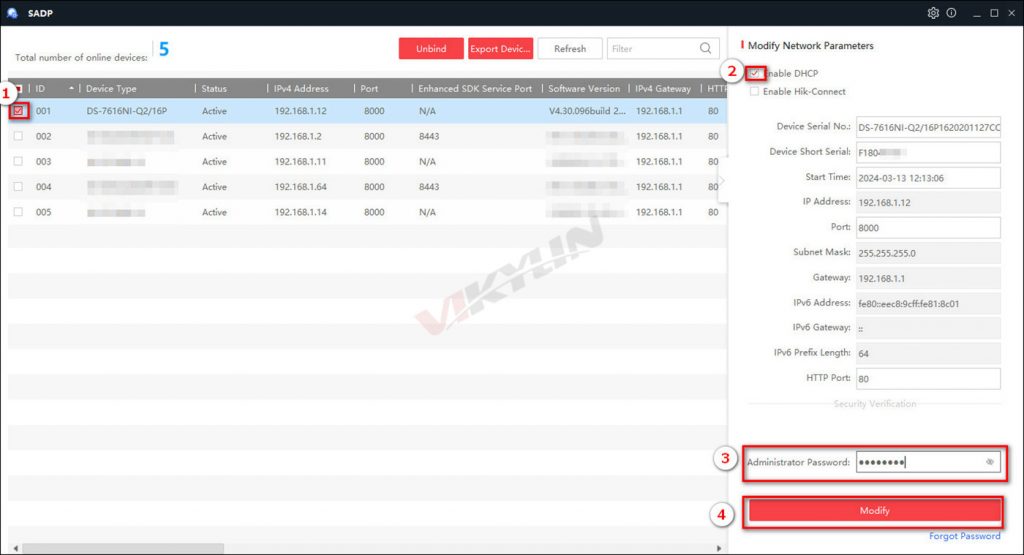
Hikvision Enable DHCP Through SADP Software
Here are the detailed steps to enable Hikvision DHCP Through SADP Tools :
- Power the NVR and connect it to local network
- Run SADP and activate the hik cameras
- Enable the DHCP service
- Click “Modify” and refresh the SADP and you will see the IP address has been modified automatically.
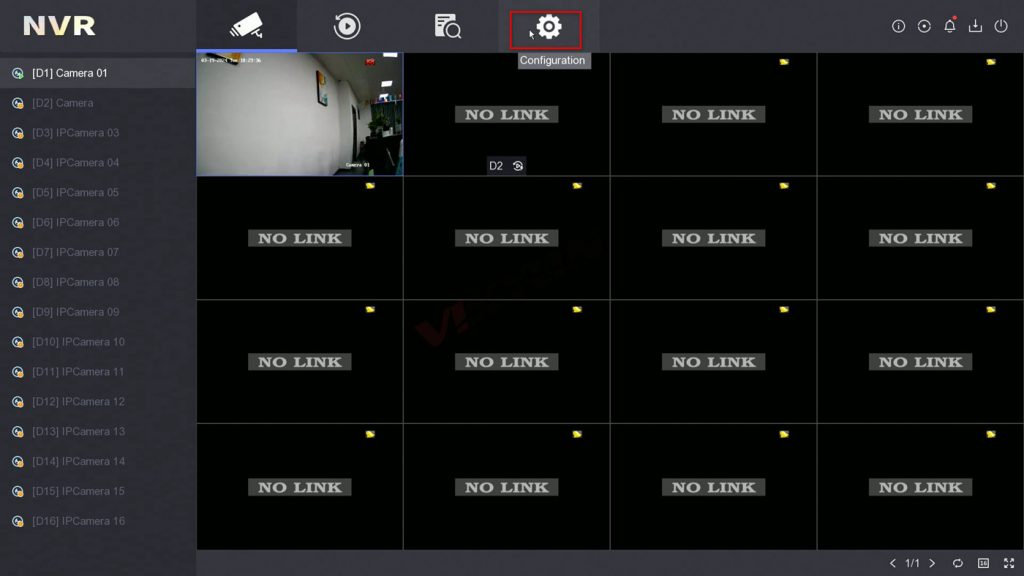
Enable DHCP By Hikvision NVR Interface
Here are the steps to enable DHCP on Hikvision NVR:
- Power the Hik NVR and connect it to local network
- Click the “Configuration” menu
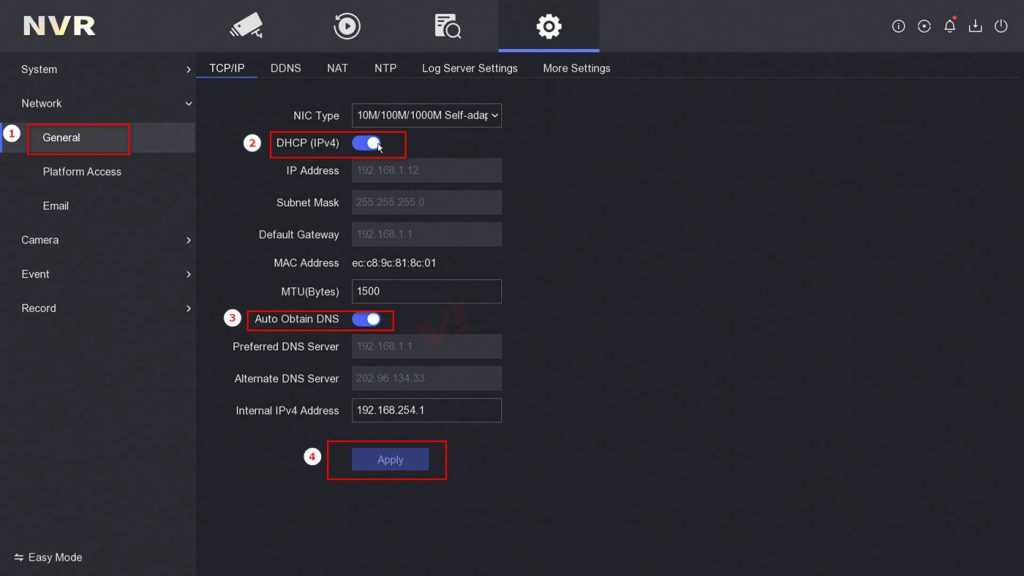
- On the network > General menu, open DHCP
- And that’s all. Just click the “Apply” button and it’s done.
hikvision dHCP not working, also support enable It through the web browser
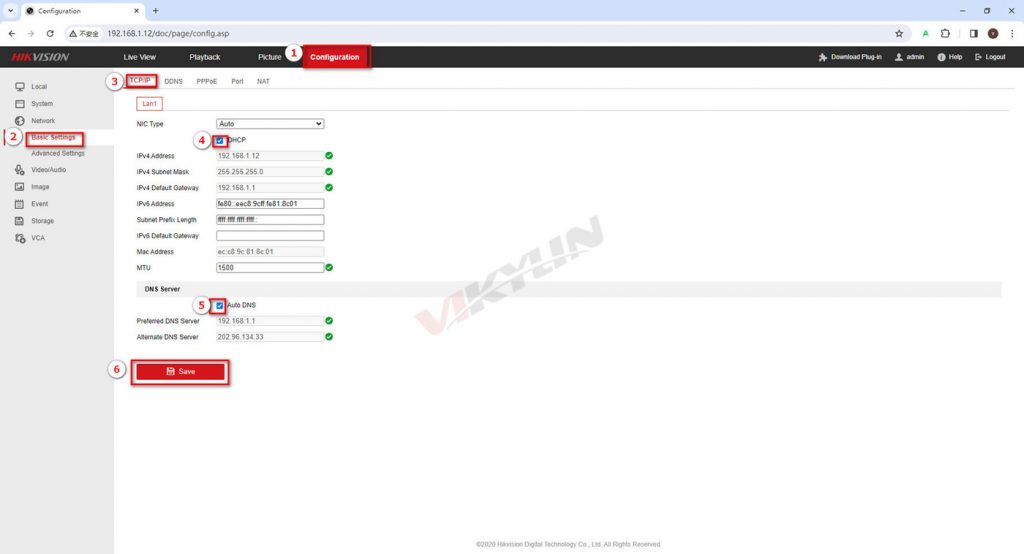
Here are the steps to enable DHCP using a web browser.
- Open a web browser (l.E.)
- Log in to the camera
- Open the network menu
- Enable the DHCP service
- Click “save”
Now that you have the knowledge about Hikvision NVR setup and to enable DHCP on Hikvision IP NVR, you can seamlessly configure other devices such as hik ip camera and DVRs. For more tips and guidance on security products and smart surveillance solutions, you can browse related articles on VIKYLIN website to learn more, or click here to contact us.